


 Building an RAF Chinook HC2A by Chris Fleet
Building an RAF Chinook HC2A by Chris Fleet

Kit: Italeri 1/48 CH-47D No. 2672
The RAF today flies two (to be 3 at some point) variants of the Chinook. The HC2 and the HC2A. I wanted to build the HC2A as it's not as commonplace as the HC2 fleet. The obvious differences that can be seen externally are broader sponsons with a 90deg lip at either end. Other external differences are mainly confined to different avionic and sensor fits.

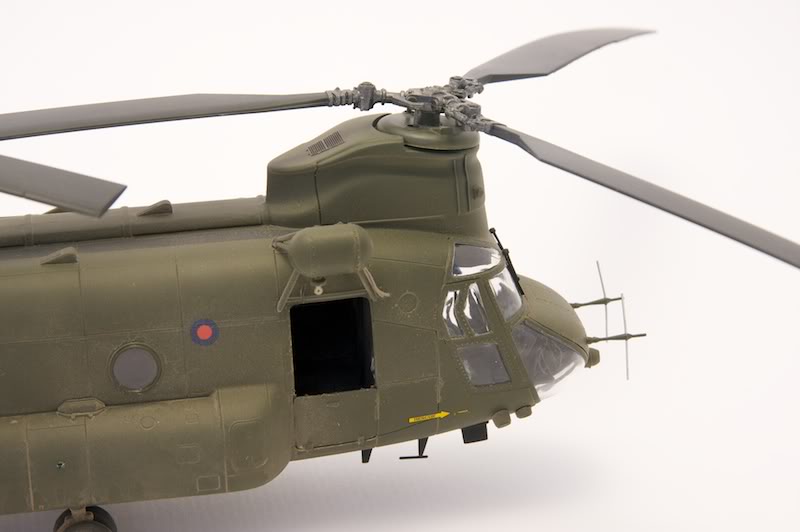
The kit is light grey injection moulded plastic and is of very high quality. Italeri have devised an ingenious way of constructing the interior away from the external shell. This allows greater detail to be added to the interior. Be warned, unless you decide to light up the inside, very little can be seen except for the rear 1/3 of the interior when finished. I detailed up the rear sidewalls with lead wire to add a bit more depth to this area. In the cockpit, photo-etch was added from the detail set to build the instrument panels and fuse panels, and further lead wire was added to add the numerous hydraulics and instrument cabling visible from the foot well windows.

The completed fuselage was primed with Tamiya primer and then painted with Vallejo Model Air US dark Green.
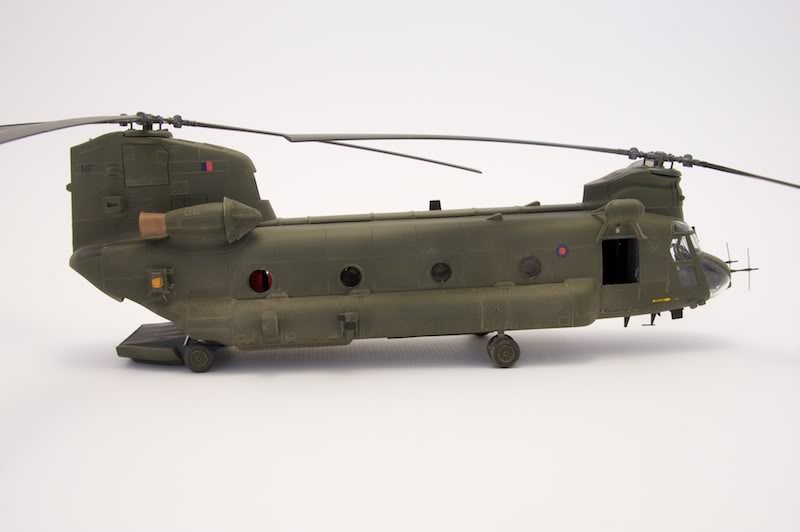
Italeri do not provide decals for an RAF HC2/HC2A, however very little is actually on the current fleet. You will need 2 fin flashes, 2 roundels and aircraft codes. These can either be printed onto decal paper, however I just raided the spares box and found what I needed.
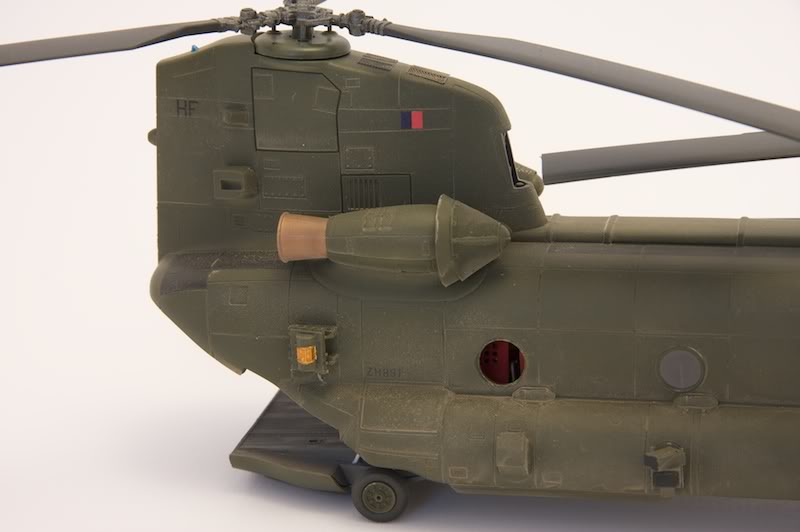
Stencil data is on the Italeri sheet, however I painted the walkways with Tamiya NATO black. Once the majority of the paintwork was complete it was time to sort out the avionics fit. No two Chinooks have exactly the same fit, so check your references! I chose to build ZH891 “HF” that is currently the only HC2A in Afghanistan with 1310 Flt. This airframe required me to add the long antennae down the port fuselage. This was scratch built using plastic rod, a pretty simple modification! Other modifications were the antennae fit under the nose and various sensors added from the detail set. The model was then given a coat of Klear (Future) and decaled.
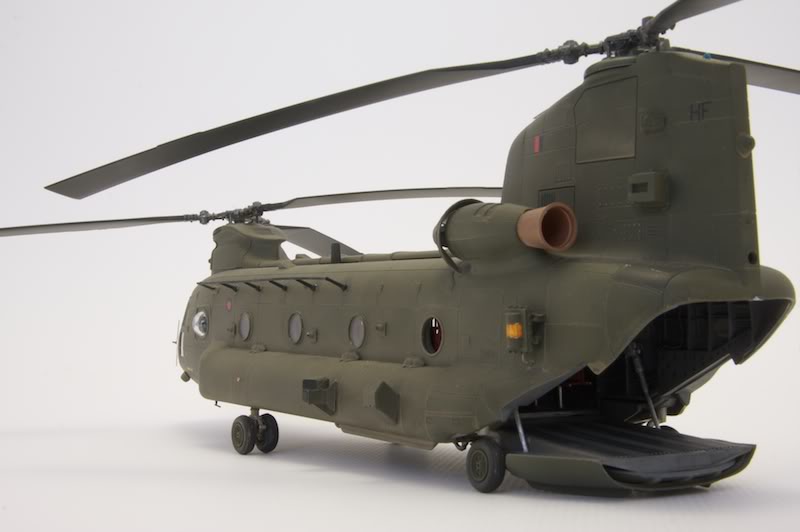
For this build I decided to try a new method I found online to weather the model to make it look dusty. Applying pigments at the end of the build usually achieve this. My concern with this is that any contact with fingers will disrupt this and unfortunately a topcoat will make the pigment disappear. To get around this I first applied a flat varnish at a high air pressure of around 30psi. This gave that grainy finish to the model. I then airbrushed promodeller’s sand wash over the model and left well alone until dry. This causes the wash to stick all over the kit and pool in the areas that would naturally accumulate sand and dust. This was then given a normal coat of flat varnish. Et viola!
I would definitely recommend the Italeri Chinook. It does take very little to modify the airframe so any RAF airframe is easily achievable with either this or their HC1 kit.
